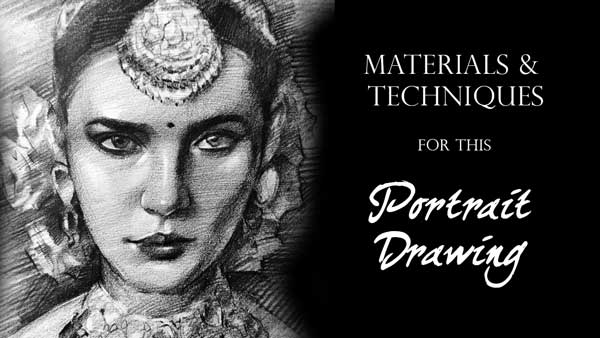
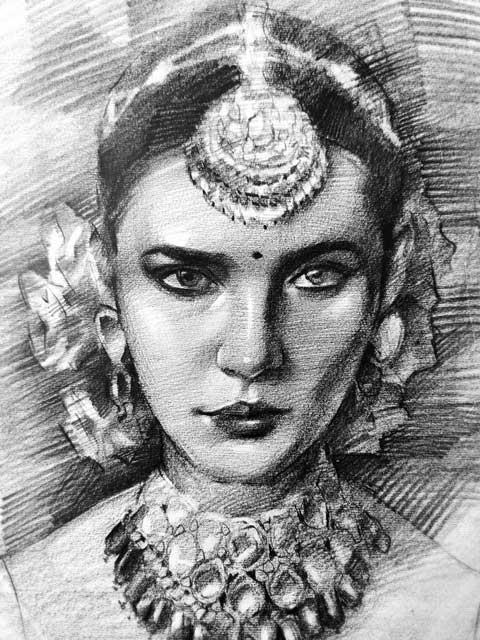
This portrait drawing was finished in 1.5 hrs, “Yes” quite a quick one and special about this portrait drawing is in the combination soft shading, soft edges and also sharp edges, and the drama in Light and dark tones. You don’t believe all the effects are achieved in a “Single Pencil”.
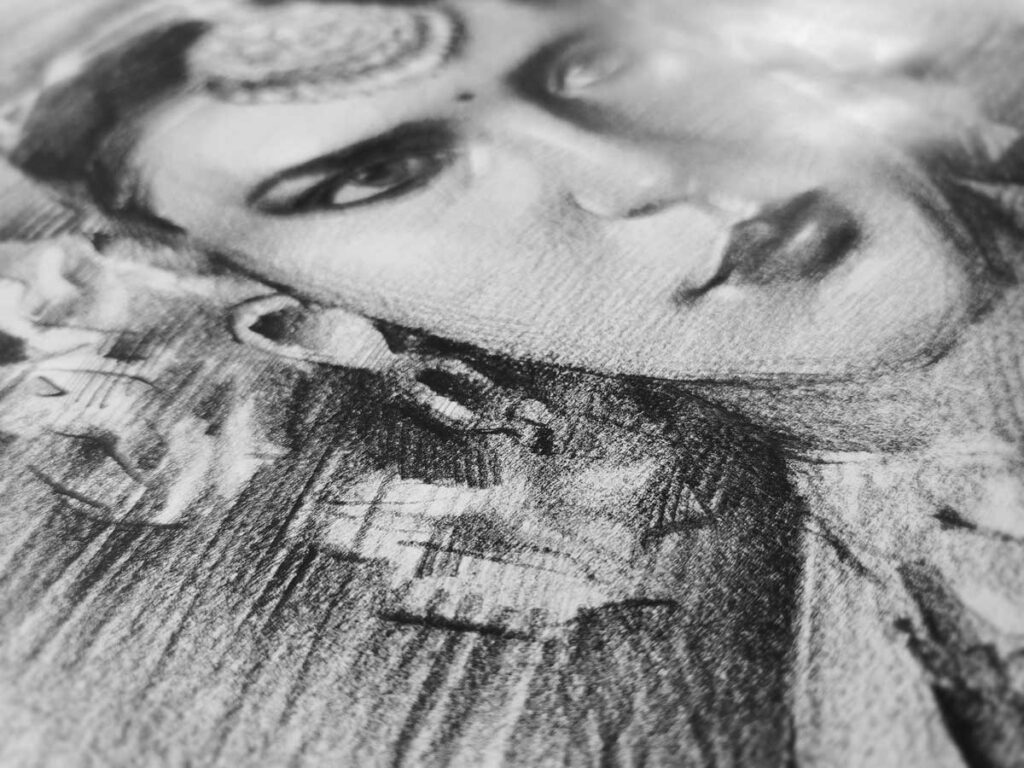
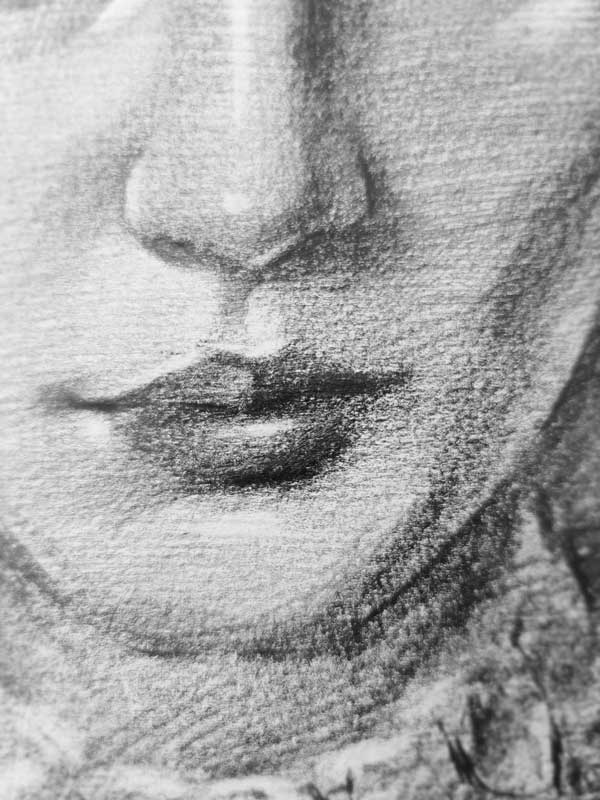
Here are some images of the Portrait drawing, look at the soft edges and Sharp edges attained using a single graphite Stick. Variation in the tones can be bought by just varying the pressure on the pencil. Strokes of the edges can go dark and thick which is used on the background patterns, Lips needs a softer shading and also dark tones to give more depth. The Kneaded eraser fives a soft edges when you erase, which is used to show the highlight on the lips and nose.
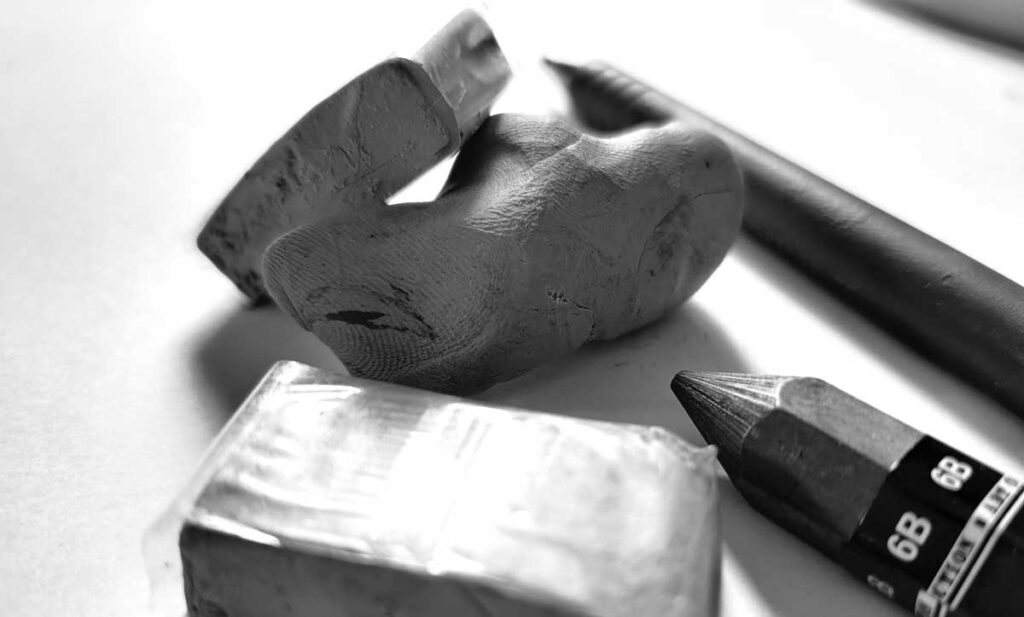
The materials used for this portrait drawing.
- Graphite stick
- Kneaded eraser
- Pen Eraser Tool
Note: You can buy these materials from AMAZON using links mentioned below

Advantage of all the three materials is mentioned below.
Graphite Stick
The beauty with this high-quality KOH-I-NOOR Graphite stick is that you can quickly finish the work as it has thicker lead and it can attain dense dark tones
- Dark tones and Light tones can be achieved in single 6B Stick
- Soft and Sharp edges with a single stick depending on how you use it
- Can fill-up the shades quickly as it has thicker lead
- One of the best quality you can get in the market
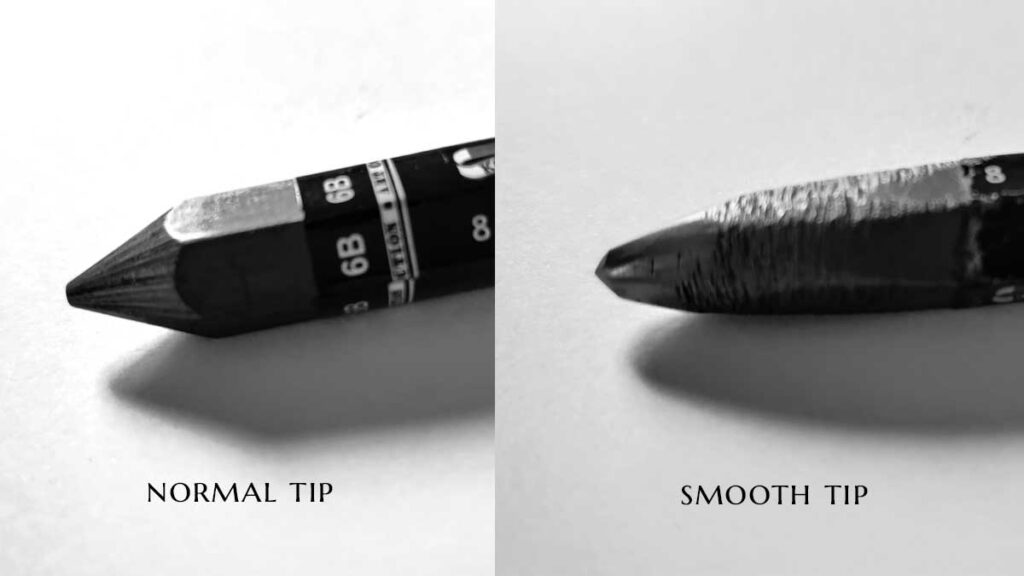
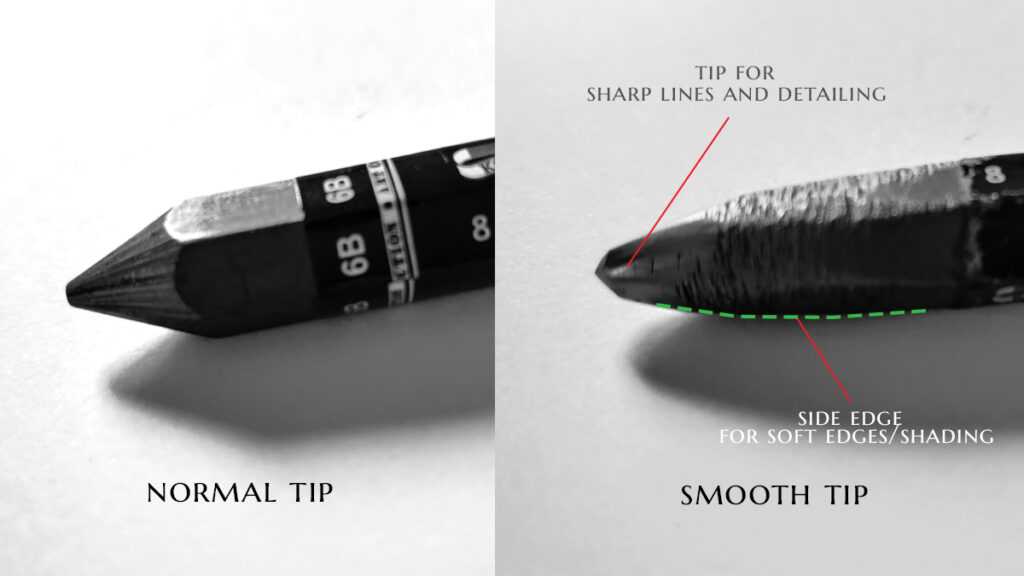
The edges you get depends on how you use this Graphite Stick. The below is the pictures shows, How the normal tip will be when you buy this stick and the smooth tip. this smooth tip can be achieved by sanding this using a sand paper which you can buy from hardware shops (120 grade will be good for pencils). soft shading can be achieved by use the side edge of the stick , sharp and dark edges can be achieved by using the Tip of the graphite stick.
Kneaded Eraser
Kneaded eraser is also called as an Artist eraser, Its not the normal eraser you buy in stationary eraser. this is a special eraser which an artist cant ignore
list of the advantage of a kneaded eraser
- This gives soft edges after erasing
- Can erase how much is needed with pressure variation
- Can be reshaped as required
Pen Eraser
Pen eraser can be used to get sharp edges and also to erase to get more brighter white of the paper. Below is the list of its advantage
List of the advantage of a Pen eraser
- Sharp edges
- More brighter area
- To get sharp and crisp hair lines
I hope this article is useful for you, To receive reviews and tips and techniques on materials SUBSCRIBE to our website by entering your email details below and also share this article with your friends
Happy Sketching
–JAYAPRAKASH PV
Share this post on social media with your friends by clicking on the links below
very informative
Thank you Deepika
I find really difficult to do human face. Especially eyes and nose. How to do that
Hello Sagar,
Any subject either its face, still life, nose… approaching as just geometric shapes makes it simple. Approach as shapes
Superb!!!!!
Thank you
Dear JP Sir,
Thanks for sharing a valuable techniques and materials used to achieve realism portraits, really appreciate the time taken to sharing masters ideas in Visual Arts kind of its own.
Thanks
Raju
Brilliant sketch!
Thanks for the detailed information!
Superb Sketch and Really very informative …Helps a lot..
Thanks ..
Thank you, sir, the information provided is very detailed and helpful too.
It would be great if you could help details about charcoal panting and its material tips.
Amazing? sketch sir, after attending the online class of 7 secret of sketch conducted by Master Jayaprakash PV , my sketch style as been changed, the technic which he has given in class that made more difference before and after & it as changed my style of sketch.
Thank you❤
Thanks JP sir , very informative review .
I had attended one of your trainings for sketching , which helped me lot in improving and understanding the basic difference between drawing and sketching
I Am glad that you liked it, hope to see improvements in your works
Very good informative article. Best materials are important to achieve best. Getting knowledge about these professional materials are primary steps before going through the techniques.
This article makes easy to understand and catch the best materials for beginners and art lovers..
Super Sir.. thanks for sharing.
Thank you, maybe you understood wrongly here, Best materials are needed but at the same time, you need to know how to use them. Always buying best materials wont make your works better, How you use them makes a lot of difference. If you know that you can make anything beautiful with any materials.
Wow quite informative esp with graphite stick. I had not done the smoothening of the stick and when used it behaved like wax crayon and sharp lines that were diff to erase. Even for bg. Thanks for the share.
Amazing work ,it was very informative about graphite sticks…
Thank you
Very beautiful art work. Hope I will improve my skill by the end of this course. The materials suggested are also required definitely to get a good finishing touch.
Thank you so much
Wonderful and thanks for sharing techniques.
You really make it seem really easy together with your presentation however I
find this matter to be really one thing which I
feel I would never understand. It sort of feels too
complex and extremely huge for me. I am looking ahead on your next put up, I’ll
try to get the hold of it!